This step-by-step guide shows you how to manually install the Pluralinput Driver. You are only required to use this guide if the automatic installation via the DeviceSetup failed.
Step 1
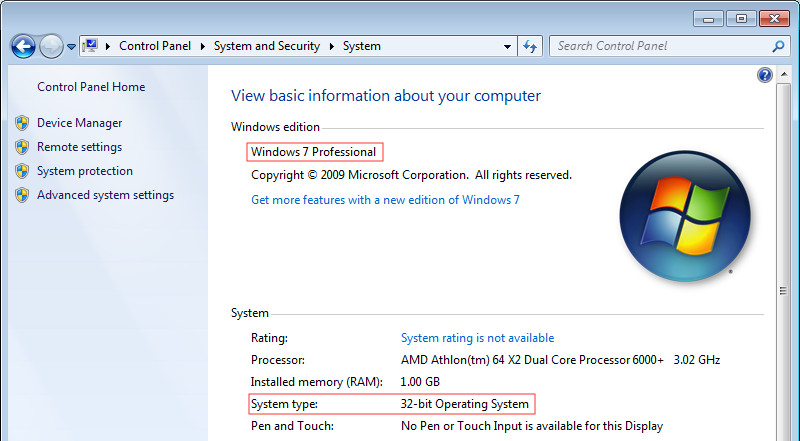
Firstly, the OS version and platform needs to be determined. If you already know which operating system you are using and whether it’s 64-bit or 32-bit, you can continue with step 2.
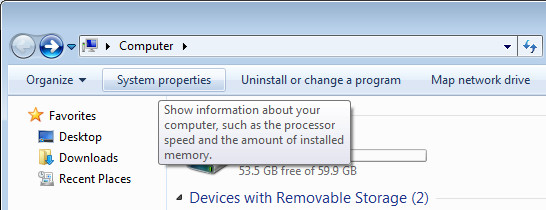
- Click on the Windows Start button ()
- Click on the Computer entry in the list on the right.
- Click on System properties
- This window now shows you your Computers properties
Step 2
Open the Windows Device Manager
- Hold down the Windows Logo Key and hit the R-key. This will open the Run-dialog:
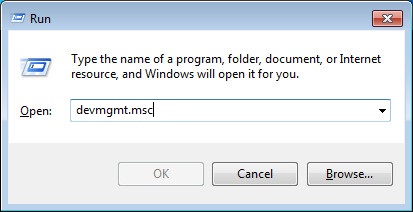
- Now type devmgmt.msc into the text area and click “OK”
- If a UAC dialog pops up, click continue
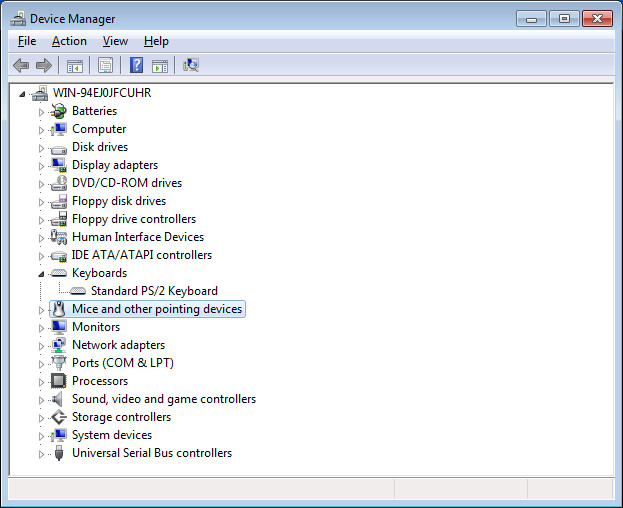
- You should see the Windows Device Manager window:
Step 3
Install the driver:
- Expand the Mice and other pointing devices and the Keyboards categories to see the attached mice and keyboards.
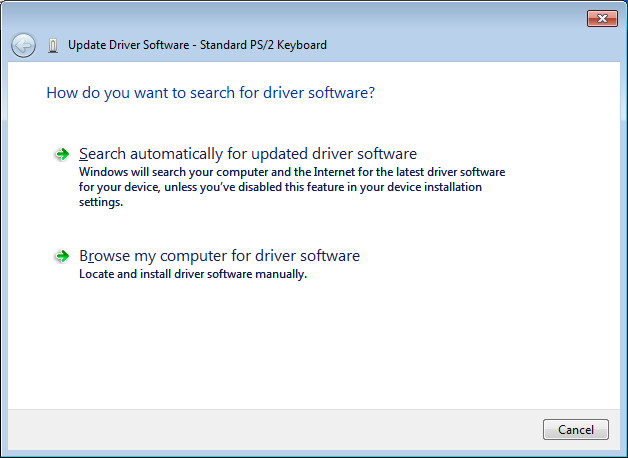
- Right-click on the device on which you’d like to install the Pluralinput Driver on and select Update Driver Software
- Click Browse my computer for driver software
- Click Let me pick from a list of device drivers on my computer
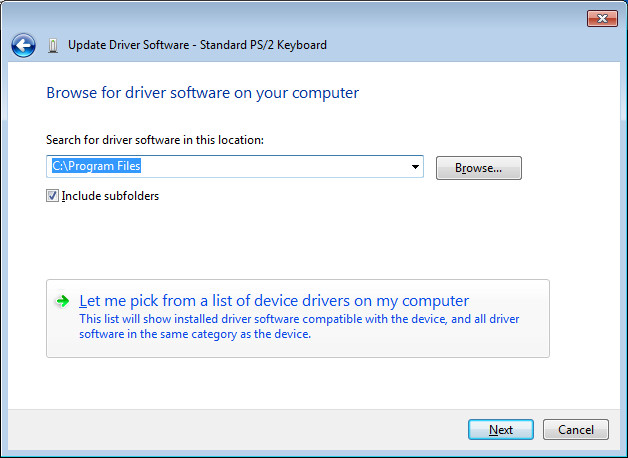
- Click Have Disk…

- Click Browse…, navigate to your Pluralinput installation directory (usually “C:\Program Files\Pluralinput”) and select the Driver-folder. You now need to open the folder that corresponds to your Windows version:
- WinXP for Windows XP
- WinVista for Windows Vista
- Win7 for Windows 7
- Win8 for Windows 8
- Win8.1 for Windows 8.1
- Win10 for Windows 10
- Next, if you have a 64-bit Windows open the x64 folder, otherwise open the x86 one. If you have selected a keyboard device, select the pikbd.inf file, if you selected a mouse, select pimou.inf.
- Finally click Open
- The driver is now being installed. If the following window pop-ups, click Install to continue.
